Cold rain comes first, then the wind pulls at every loose edge. By January, hard frosts arrive and water finds the smallest gap. Norwich roofs live with that cycle every year. Preparing early, and preparing well, saves leaks, plaster repairs, and the unpleasant surprise of a dropped ceiling on a Sunday night. I have climbed more roofs than I can count across NR1 to NR8, out toward Aylsham and down to the Broads, and the same truths repeat: prevention wins, details matter, and winter rewards the homeowner who knows their roof rather than fears it.
This is a practical guide to getting a Norwich roof winter ready. It blends trade experience with local realities, because conditions in Norfolk are not the same as in the Pennines or the south coast. The city’s stock ranges from slate-fronted Victorian terraces off Unthank Road to 1960s concrete interlock tiles and newer estates with breathable membranes. Each has strengths, and each has vulnerabilities when the temperature drops and the wind swings from the northeast.
What winter really does to a roof in Norwich
Winter is not one thing here. It shifts between maritime damp and continental cold. That mix is tough on a building envelope. Persistent drizzle saturates tile laps and ridge mortar. Sudden frosts can pop a hairline crack into a broken tile. Northerly gusts lift at the weakest point, usually where an old nail has corroded or flashing has lifted at a change of plane. Gutters swell with a week’s worth of birch leaves and then freeze overnight, turning into heavy troughs that pull fixings loose.
On a pitched roof, water does not fall straight down. Wind drives it up under laps, around abutments, and into mortar joints. Properly laid tiles and slates account for this with edging, overlaps, and fixings that consider the design wind load for our region. The trouble is that roofs evolve: an extension alters flow, a satellite dish installer moves tiles, a patch repair leaves a weak lap. Winter exposes those moves.
Flat roofs see a different problem. A small blister in an aged felt system might be harmless in August; in December, a blocked outlet and a week of rain can turn it into a pond. The extra load stresses the deck and amplifies any seam weakness. I have seen garages in Eaton bow with just a few centimetres of standing water after a cold snap.
All of this is routine weathering, not catastrophe. A roof does best when we anticipate the predictable patterns, then prepare.
Where to start: looking up from the ground
Most homeowners can make a sound first assessment without climbing a ladder. Stand back on the pavement or a safe driveway spot and look at lines and symmetry. A good roof looks tidy in silhouette: straight ridges, flat valleys, even tile courses, gutters that follow the fascia without dips. Irregularities are clues. A sag in a ridge line often points to a failing bed of mortar, a lifted row of concrete interlocks could mean nail fatigue or a membrane issue, and a wavy eaves line may signal rotten fascia or slipped brackets.
Use a pair of binoculars on a bright day. Scan the ridge, then contact us the hips, then the verge edges. On Norfolk clay tile roofs, hairline cracks can be hard to see from distance, but missing nibs or slipped units stand out. With slate, look for a shimmering difference where a metal tingles through the gaps, a sign of slipped slates fastened with repair hooks, sometimes called “tingles”. Those are acceptable as a spot fix, but a growing field of them indicates the nails beneath are failing, a condition we call nail sickness, common on older properties.
Check the chimney stack. Open joints, flaking flaunching on top, or a dark, damp band beneath the lead apron flashing are classic ingress points. On many Norwich semis the rear chimney takes the weather, sheltered at the front by the neighbouring house, so give the back elevations particular attention.
From the ground, inspect the gutters and downpipes. If you can see moss clumps, leaf mats, or a lift at a joint, you have restricted flow. Overflow marks show up as streaks down the fascia or a greenish line along the brickwork below the gutter. Water running behind a gutter often starts with a loose bracket pitching the run away from the fascia.
All of this takes ten minutes, and it tells you whether you can plan a simple clean and monitor, or call a tradesperson for a closer look. Norwich & Norfolk Roofers, and other local firms with established scaffolding partners, will often provide a photo survey with their quote. Photos beat guesswork every time.
The anatomy of a sound winter roof
Roofs fail when a small element is missing or tired. Understanding the critical points helps you triage.
At the ridge and hips, mortar alone is not considered sufficient under modern standards, especially in higher wind zones along the Norfolk coast. Although Norwich itself sits a little inland, our storms have enough energy to lift mortar-only ridges. A dry ridge system, with mechanical fixings and ventilated unions, sheds water and allows the roof to breathe. If your ridge mortar is cracked and shedding, winter is when pieces break free, slide down, and block gutters. Re-bedding can work if the tiles and bed are sound, but when we replace ridges before December, we prefer to move to a dry fix system unless the conservation setting calls for traditional work.
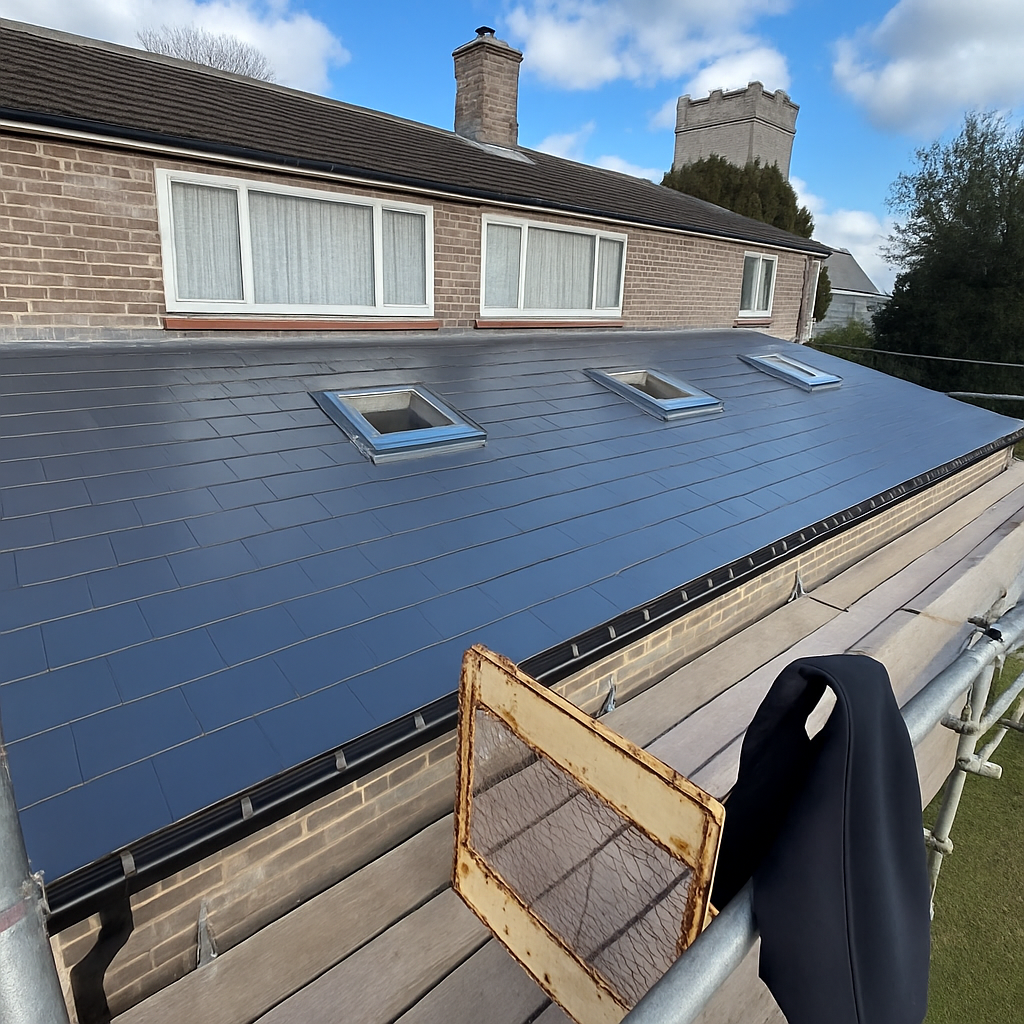
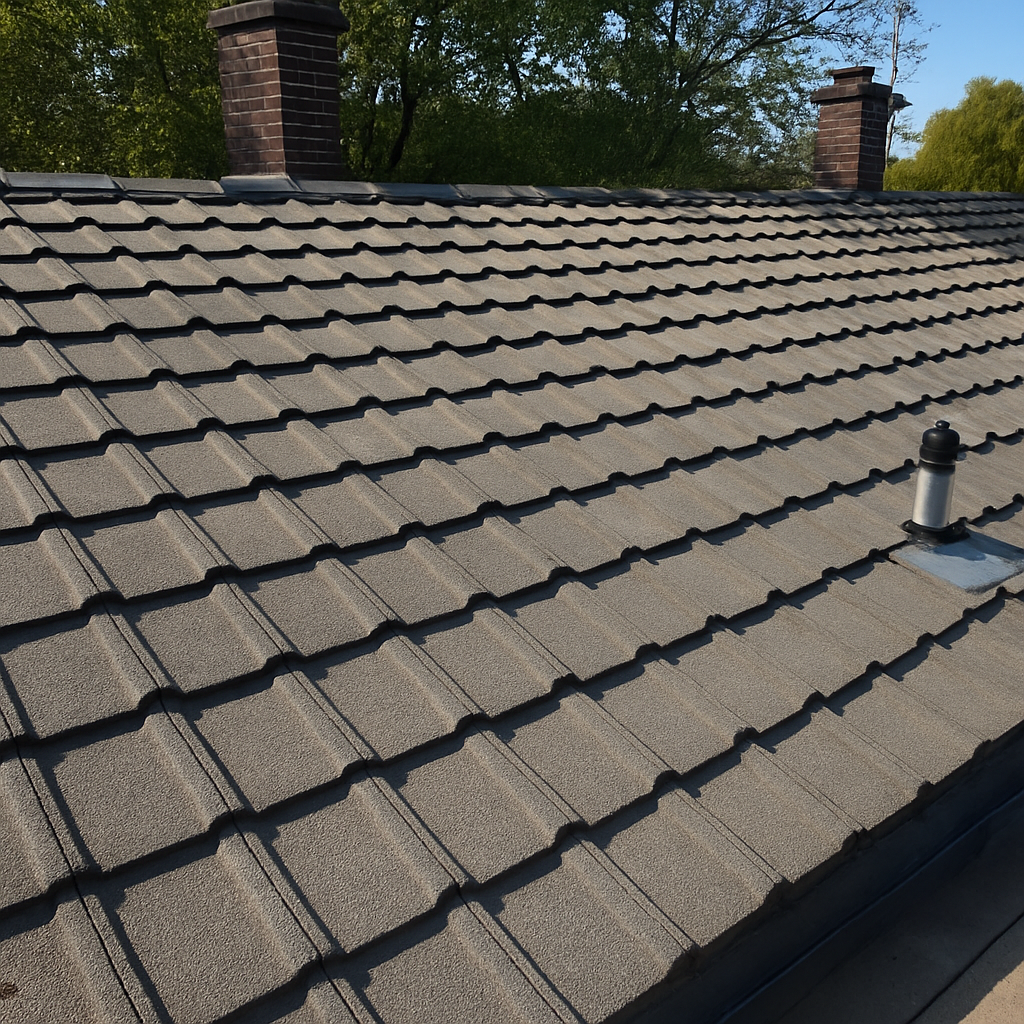
At verges where tiles meet the gable end, older builds have wet verge mortar, newer ones often have plastic caps clipped to a batten end. Wet verges crack over time from thermal movement. December winds drive rain laterally into those cracks, wetting undercloak or soffit boards. If you can see daylight from inside the loft at the verge line, that joint needs attention before the gales arrive.
Lead flashings at abutments are another weak link. Lead lasts decades if installed with proper laps, expansion joints, and chased into brickwork with wedges, then pointed with mortar or a lead-compatible sealant. The common winter leak occurs where the upstand is too short, the chase is shallow, or the pointing has failed. Wind pushes rain up the tiles and under the apron. You will spot it indoors as a damp patch to the side of a chimney breast or along the ceiling line at a dormer cheek. Good firms refit the lead, not just smear sealant on the edge, because sealant-only fixes fail quickly in cold weather.
Ventilation is not a luxury. Norfolk winters bring long periods of high humidity. When warm indoor air meets a cold roof deck, you get condensation. In a loft, that looks like glistening felt, dark batten stains, or drips from nail tips. When this goes unchecked, the battens and even the rafter ends can degrade. Tile vents or ridge ventilation, coupled with clear eaves vents, keep air moving. The trade-off is always between airtightness for heat and ventilation for moisture control. The right answer depends on insulation levels and occupancy. If you have recently added 270 mm of loft insulation, make sure the eaves vents are not smothered, or winter will show you the mistake in mould spots.
The gutter problem, solved before the freeze
I have never met a winter leak that became better with a blocked gutter. Gutters are simple hydraulics: collect, move, discharge. Leaves and moss interrupt every stage. Norwich is leafy, and older streets have gutters that run long spans to a single downpipe. A small fall error or a couple of sagging brackets can turn a 12 metre run into a trough.
Cleaning is the basic need, ideally after the last leaves drop. Do not forget the outlets and the first elbow in downpipes, where debris lodges like a cork. Where gullies discharge into a combined drain, confirm the grid is clear. I have traced kitchen damp to nothing more glamorous than a clogged gully that backed water up under the shoe of a downpipe.
If your gutters overflow regularly even when clean, look at capacity and fall. Deepflow profiles help on long roofs that shed hard. Shortening bracket spacing, especially near corners and outlets, prevents dips. On older wooden fascias, brackets can loosen because the timber has softened. I have replaced a whole run of fascia on a terrace near Magdalen Road, only to find the real culprit was a single rotten fixing point that allowed the centre of the run to drop. Winter magnifies that sag under the weight of ice. A half day of joinery in October would have spared the ice dam that followed in January.
Moss, tiles, and the temptation to pressure wash
Moss is common on Norwich roofs, particularly north-facing pitches shaded by trees. Moss holds water, delays drying, and in freezing weather can trap moisture at laps. On concrete interlock tiles, heavy moss can lift courses just enough for capillary action to pull water up. On clay and slate, it invades pores and softens surfaces over time.
The answer is never a pressure washer. High-pressure jets strip the tile surface, flood the cavity, and leave a roof worse than before. A gentle scrape and brush, followed by a biocidal wash where appropriate, is the sensible method. The treatment continues working for months, and regrowth slows. I have seen big aesthetic changes within six months and, more importantly, fewer winter ingress calls from the same addresses. Be wary of anyone who offers a quick blast and a same-day finish.
If moss is heaviest at the eaves, look at shade patterns. Trim a branch, let the sun reach the lower courses, then deal with the growth. Sometimes the practical move is to accept a modest level of moss and keep gutters clear. Perfection is not a requirement for weather tightness.
Attic checks and insulation balance
Step into the loft on a cold morning before the heating has been roaring for hours. Your breath will tell you how damp the air is. A healthy loft smells dry with a faint resin note from rafters. If the air feels clammy, focus on ventilation routes. Check soffit vents, lift the insulation at the eaves, and ensure baffles or spacers keep a clear path from the soffit up into the loft void. Modern breathable membranes help, but they are not a substitute for air movement when insulation levels are high.
Look at the underside of the felt or membrane. Bituminous felt in older roofs can show white mineral at the surface, and drips from nail tips betray condensation. In that case, tile vents, ridge vents, or eaves vent upgrades make a difference. You may also be losing moist air from the house into the loft through recessed lights, unsealed loft hatches, or bathroom extractors that dump into the loft instead of outside. Winter amplifies these flaws. Seal the hatch with a compressible strip and add insulation to the hatch itself. Make sure extractor ducts run to a proper roof cowl or wall vent with a backdraft flap.
While you are there, check tank and pipe insulation. A burst loft pipe ruins more than plaster. Norwich winters are not Siberian, but a few subzero nights in a row, coupled with a draught over a bare pipe, is enough to freeze a run. Insulate and clip the pipe so it cannot move and chafe. If you have a cold water storage cistern, fit a rigid lid and lag the sides and top. Do not lag underneath the tank base, you want heat from the house to reach the water, but you want the sides protected.
Flat roofs: felt, EPDM, and the things that leak
Many Norwich extensions and garages have flat roofs. Older ones are often built-up felt on a timber deck; newer installs might use EPDM rubber or a liquid-applied system. Winter stresses these systems differently than summer.
Water standing on a felt roof in December is not just a cosmetic issue. Ponding finds pinholes at laps and at penetrations like vent pipes. Felt blisters when vapour within the system expands and contracts. If your roof has a persistent pond more than a few millimetres deep after a dry day, note the location. A good roofer can often improve falls with tapered insulation or correct a sagging joist. I have replaced decks where the OSB had dark rings around ponded areas, a sign the water had found a path around a blister months earlier.
EPDM tolerates cold well and stays flexible. Most EPDM leaks I see come from terminations and upstands where the membrane meets a wall or rooflight. Winter wind drives water against those edges. If the termination bar has pulled away or the sealant over the top is failing, water tracks behind the membrane. Check rooflights too. On older polycarbonate domes, the gaskets shrink. You will see dirt tracks inside the dome and damp on the curb timber.
A winter-friendly repair on a flat roof is one that can be done in marginal temperatures and still bond correctly. Many adhesives have a temperature range for use. Norwich & Norfolk Roofers and other established contractors plan these jobs around forecast windows. If a quick patch is all the weather allows, pro crews will return in spring to deliver a full resurfacing or redesign. Avoid cold-day DIY with products that never cure, then fail in January when you least want to be up a ladder.
Storm preparation: when the forecast turns ugly
People call on the day of the storm, not the week before. You can get ahead without spending much. Secure any loose items near the roof line: TV aerial cables, dangling wires, solar PV conduit that needs an extra clip. Check that the loft hatch closes snugly; a lifting hatch door can nod under gusts and pull warm air up, increasing condensation right when you want the roof cold and calm.
Know where your internal stopcock is. If a ridge tile does go and water tracks down a valley to a loft tank and then overflows, you will want to stop the flow fast. Keep a torch in the same cupboard. It makes a difference when the lights go.
For those in exposed spots, especially on the north and east of the city, consider a pre-winter visit from a roofer to check mechanical fixings at ridges and verges. The expense is small compared to a January emergency call-out with temporary sheeting and return visits. Some homeowners try to schedule roof work in spring and summer only, but a lot of winter failures start with loose fixings that could have been tightened in October.
The Norwich context: materials, conservation, and honest trade-offs
Working locally teaches you patterns. The city has stretches where slate dominates and areas where concrete interlocks are the norm. In the Golden Triangle, many homes have attractive clay tiles that are now a century old. Replacing like-for-like is not just an aesthetic choice; it matters for weight and pitch. Swapping to a heavier tile on a lightly framed roof can invite sag. The better answer is to repair and maintain clay where possible, then plan a thoughtful reroof with the correct batten gauge, breathable membrane, and stainless fixings when the time comes.
Conservation areas add another layer. Dry ridge and verge systems with plastic elements can be inappropriate in a street with traditional detailing. We have used hidden mechanical fixings with a lime mortar finish on some jobs to satisfy both performance and appearance. That kind of solution requires experience and a client who understands the trade-off between strict tradition and long-term resistance to Norfolk wind.
On bungalows, which Norwich has in abundance, access is easier and so is neglect. Because you can almost reach the roof, it is tempting to ignore minor defects and plan to “sort it next weekend.” Those weekends slip by, and winter punishes the delay. A cracked valley trough on a bungalow can leak for months before showing up on the ceiling, because the voids are large and insulation absorbs the first litres of water. If your bungalow has concrete valley tiles, inspect them closely. Many from the 1970s era are nearing the end of their service life. A modern GRP valley tray sits under the tiles and handles driven rain better than the old mortar-only approach.
Repair or replace: making the call before December
People dread being told they need a full reroof. Often they do not. Winter prep is about doing enough to get through safely and smartly, not about pressing for a large project under pressure. A few principles help:
- Work with the life left in the covering. If a roof has broad integrity, fix the edges, the ridges, the valleys, and the flashings, then nurse it through. If every other slate is on a tingle and the nails are dust, plan for a reroof in a fair-weather window, using temporary fixes to get through winter. Respect water paths. Fixing a ridge while ignoring a rotten valley is like patching a tyre sidewall by topping up the air. Map how water moves, then strengthen the route step by step. Use mechanical solutions where you can. Dry fix systems and proper clips hold up under wind better than mortar alone. There are heritage exceptions, but performance counts when the forecast reads gusts to 55 mph. Plan for ventilation while you thicken insulation. Warm houses with tight envelopes still need roofs that breathe. Tile vents are small additions that save timber. Accept that some winter work is temporary. A lead patch applied in 2 degrees and rising can hold, but a full reflash of a chimney wants a decent, dry spell. Good roofers will say so plainly.
Those points shape estimates. Ask for itemised options. If a firm cannot explain why a £380 valley repair might save a £2,000 ceiling disaster, or why a £2,500 dry ridge conversion is better than a £900 rebed in your wind exposure, keep asking until you understand. Norwich & Norfolk Roofers and other reputable companies will walk you through the choices with photos and, ideally, a few references from streets you know.
Solar panels and winter: coexisting without leaks
Norwich has seen steady PV uptake. Panels change wind flow and add penetrations for mounting. Installed well, they do not compromise a roof, but winter finds the weak jobs. Water tracks around poorly flashed mounting brackets, especially on interlock tiles. If you are adding PV, insist on a roofer working with the solar installer, not just a crew that lifts tiles and hopes for the best. Branded tile replacements with integrated brackets exist for many profiles. They cost more, but they avoid bodged cuts and gasket failure.
If you already have PV, ask for a pre-winter inspection of the mounting points visible from the loft and of any obvious stress points along rail lines. Snow loads are rare here, but a sudden, wet snowfall can dump a lot of weight. Panels shed snow quickly once the sun hits, which can avalanche onto gutters. Robust brackets and correctly set gutter falls mitigate the impact.
Costs, timing, and what a Norwich winter schedule looks like
Prices vary with access, materials, and scope, but ranges help planning. A straightforward gutter clean with minor bracket tweaks on a typical terrace might run between £80 and £180 depending on length and height. A dry ridge conversion on a semi with 10 to 12 metres of ridge might be £1,500 to £2,400 including materials and disposal. Replacing a lead apron to a chimney and repointing the stack often falls between £350 and £900, rising if full step flashings and back gutters are required.
Flat roof patching can be a few hundred pounds; full overlays or replacements with EPDM or torch-on felt range from £60 to £120 per square metre for typical domestic work. Valleys vary widely: a GRP valley replacement down a hip on a bungalow can be £500 to £1,200 depending on length and tile type.
Weather constrains schedules. November and December see short days and damp conditions. Good contractors leave contingency in the diary for storm response, so plan early if you want booked work. If you call during a gale, expect triage: temporary sheeting or foam fillers to arrest ingress, then a return visit. That is not laziness, it is the reality of safe working. No one should be re-bedding ridge tiles in 40 mph gusts.
Two short checklists that keep you ahead
Pre-winter homeowner check, from the ground and loft:
- Scan ridges, hips, verges, and valleys for cracks, dips, or missing units. Use binoculars if needed. Look in the loft for damp felt, dark batten stains, or drips on nail tips. Confirm soffit vents are clear. Clear gutters, outlets, and downpipes, and look for sagging brackets or overflow marks on fascia. Inspect chimney flashings and pointing from the ground, and watch interior walls near stacks for damp bands. Note any persistent moss mats, particularly at eaves, and plan a gentle clean, not pressure washing.
When a roofer visits, ask for:
- Photos of defects and of the proposed fix locations, before and after. Clarification on mortar-only versus mechanically fixed solutions at ridges and verges. Ventilation strategy if insulation has been increased, including eaves, tile, or ridge vents. Material choices suitable for your roof type and any conservation constraints. A plan for temporary weatherproofing if the job spans unsettled weather.
Real-world examples from local streets
A detached house off Newmarket Road had a recurring damp patch behind a bedroom wardrobe every January. Three previous “repairs” had sealed the edge of the flashing with mastic. We lifted the apron, found a two-course chase depth with shallow wedges, and a back gutter that ended flush with the brick rather than turning into it. We refitted with a stepped flashing, chased 25 mm deep, installed a proper lead back gutter with a 150 mm upstand, then repointed with a lead-compatible mortar. The next winter was wetter than average. The wall stayed dry.
A row of 1930s semis near Heartsease had concrete interlock roofs with wet verges that had begun to crack like a dried riverbed. During a February blow, chunks of mortar fell into front gardens. The owners wanted to push a full reroof to summer, which was sensible. We installed dry verge systems on new batten ends, tightened a handful of nail fixes at the eaves, and resecured a slightly wandering ridge with mechanical clamps. Those selective works carried the houses through two winters without drama, and the owners later timed their reroofs for calmer weather and better material availability.
On a Thorpe St Andrew bungalow, the owner reported gutter waterfalls every time it rained. The gutters were clean. The problem was a 16 metre run to a single downpipe, with two brackets pulled from a softened fascia. We replaced a section of fascia, added three brackets to even the fall, and swapped to a deeper profile. A modest job, but the difference was profound. The owner wrote six months later, after a week of wind and rain, to say the drive was finally clear of puddles.
Choosing help you can trust
The phrase roofing Norwich appears in many advertisements, but the right partner is usually the one who talks through the sequence, not just the price. Look for firms that:
- Provide clear diagnostics with photos, not vague blame on “old roofs.” Understand local materials and constraints, from clay tile gauges to conservation details. Measure success in winters survived without call-backs, not in square metres sold.
Norwich & Norfolk Roofers is one example of a local team with a footprint across the city and county, but there are others who do fine work. Ask for addresses you can walk past to see completed jobs. A well-laid ridge or a tidy valley tells its own story.
What to do when water appears anyway
Despite preparation, roofs sometimes leak. Act methodically. Catch water, protect electrics, and photograph the interior stain. If it is safe, look in the loft to spot the entry point. Water runs along timbers, so the wet patch in the room might be a metre from the actual hole. Do not start pulling tiles in a storm. Call for help and be ready to accept a temporary measure. Roofing is dangerous in high wind and driving rain, and the best temporary fix is the one that keeps you safe and buys time for a proper repair.
After the event, do not redecorate immediately. Allow the area to dry, confirm the fix has held through another wet period, then seal and paint. If insulation has soaked, pull it and replace. Wet insulation slumps and loses performance even after it dries.
The payoff for doing winter prep well
A sound roof is quiet. You notice the absence of worries, not the work itself. No drip marks, no rattles at the verge, no gutter waterfalls that freeze onto the path. Energy bills ease because your insulation stays dry and effective. You can wait for a fair-weather window to tackle larger projects rather than being forced into hurried decisions during a cold snap.
That peace of mind is the point. Winter will test Norwich roofs with damp air, sharp frosts, and the occasional gale that roars down the Wensum valley. Meet those tests with small, well-judged actions now: a good clean, a check of fixings and flashings, ventilation balanced with insulation, and straightforward repairs where the roof tells you it needs them. When you prepare the right way, the season passes and your home stays dry, solid, and ready for spring.